How to Use MagTool N100 Plus Protein Skimmer?
To use the MagTool N100 Plus Protein Skimmer, assemble it, place it in 6.5 to 7.5 inches of water, then tune the pump slowly. Start with gentle settings, stabilize the foam head, and adjust airflow until the skimmer produces consistent skimmate. The MagTool N100 Plus Protein Skimmer uses a compact 5.0 by 4.3 inch footprint and supports 50 to 100 gallon reef systems. Those specifications make correct placement especially important for reliable operation.
Key Takeaways
- Keep the skimmer in 6.5 to 7.5 inches of stable sump water.
- Start the DC pump at a low setting during initial tuning.
- Adjust pump power and airflow gradually instead of making large changes.
- Give the skimmer time to develop a stable foam head.
- Clean the collection cup, neck, air path, and pump regularly.
- Lower the pump setting when foam rises too aggressively.

Understand What the N100 Plus Needs Before Starting
The N100 Plus works best when you treat setup as a tuning process. Protein skimmers depend on stable water depth, airflow, bubble formation, and controlled internal water movement.
According to available product specifications, the N100 Plus targets 50 to 100 gallon reef tanks. Its recommended operating depth sits between 6.5 and 7.5 inches of water.
The skimmer also uses a controllable DC pinwheel pump and a compact internal design. Therefore, you can adjust skimming intensity without replacing the entire filtration unit.
Check Your Sump Dimensions
Measure the available sump chamber before placing the skimmer inside. The compact footprint helps, but you still need enough clearance for the collection cup.
Also check the skimmer height against your cabinet and sump access. Leave enough room to remove the cup without hitting the aquarium stand.
Identify the Main N100 Plus Components
Understanding each component makes assembly and troubleshooting much easier. The pump creates water movement and draws air into the reaction chamber.
The air intake system controls how much air enters the pump. Meanwhile, the collection cup captures the concentrated organic waste produced by foam fractionation.
The controller lets you change pump output according to your aquarium’s bioload. The outlet adjustment also helps control the internal water level.
| Component | Primary Function |
|---|---|
| DC pinwheel pump | Creates water movement and fine bubbles |
| Air intake | Supplies air for foam production |
| Collection cup | Collects concentrated skimmate |
| Controller | Adjusts pump output |
| Outlet adjustment | Controls internal water level |
| Silencer | Reduces intake noise |
Assemble the MagTool N100 Plus Correctly
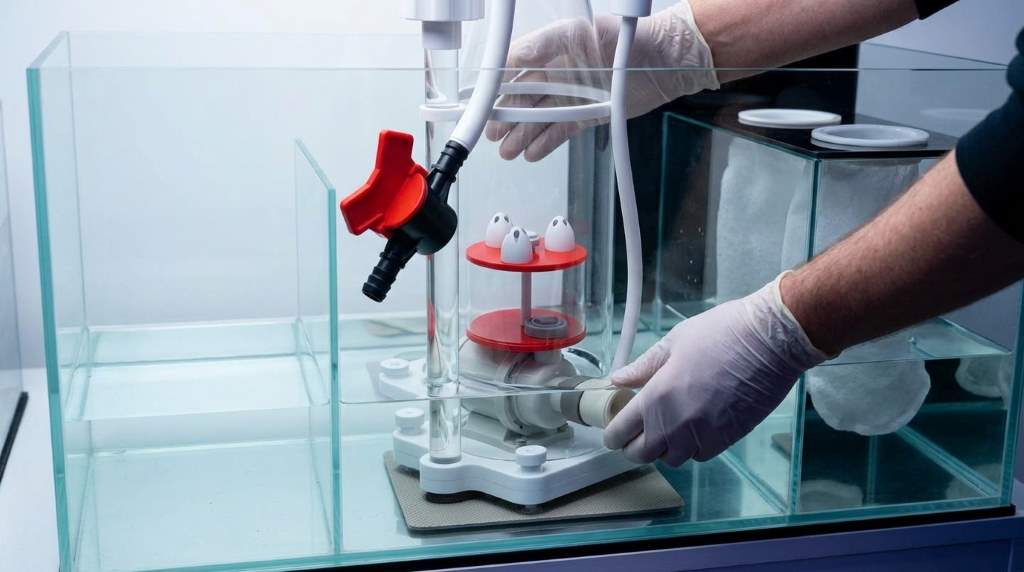
First, unpack every component and inspect the pump, tubing, cup, and body. Look for cracks, loose fittings, damaged cables, or missing seals.
Next, attach the DC pump securely to the skimmer body. Make sure the pump sits firmly without forcing any plastic connection.
Then connect the air tubing to the pump’s air inlet. Attach the air silencer to the opposite end of the tubing.
Afterward, place the collection cup securely on the skimmer body. Check every connection before placing the assembled unit into the sump.
Inspect the Air Path
A restricted air path can weaken bubble production and make tuning frustrating. Keep the tubing straight and prevent sharp bends near the pump.
Also keep the silencer away from splashing water. Moisture inside the air path can interfere with consistent airflow.
Place the Skimmer at the Correct Water Depth
Position the assembled skimmer inside a sump chamber with a stable water level. Aim for 6.5 to 7.5 inches of water around the unit.
Water depth strongly affects the internal pressure and foam height. Even a small depth change can alter how quickly foam reaches the cup.
If your sump fluctuates significantly, consider using an automatic top-off system. Stable water depth makes daily skimmer tuning much easier.
Why Water Depth Matters
Too much water can push the foam head higher than intended. That condition can cause wet skimmate or repeated collection cup overflow.
Too little water can weaken the foam head and reduce consistent skimming. Therefore, correct sump depth should come before aggressive pump adjustments.
Start the N100 Plus for the First Time
Once the skimmer sits correctly, connect the pump to its controller. Then connect the controller to the appropriate power supply.
Start the pump at a low power level instead of immediately selecting maximum output. Watch the reaction chamber for several minutes after startup.
Fine bubbles should fill the chamber without producing uncontrolled turbulence. Avoid chasing a tall foam head during the first few minutes.
New skimmers often need time to stabilize their internal surfaces. During this period, foam production can appear inconsistent or unusually wet.
Dial In the Foam Head
The goal involves creating a stable foam column that slowly rises toward the collection cup. You want concentrated foam rather than clear water flooding the cup.
Begin with moderate pump power and observe the foam for several minutes. Make only one adjustment at a time.
If foam rises too quickly, reduce pump power or lower the internal water level. If foam stays extremely low, increase output gradually.
Use Small Adjustments
Small changes provide better control than repeated large adjustments. After every change, allow the skimmer enough time to respond.
Keep a simple note of useful settings during the first week. This record helps you restore performance after cleaning or water changes.
Adjust Airflow Without Overcorrecting
Air intake changes can significantly affect bubble density and foam behavior. Therefore, avoid turning the airflow control rapidly between extremes.
Start near a moderate position and watch the bubble column. Then make small changes until the foam rises steadily.
A stronger airflow setting does not automatically produce better skimming. Excessive air can destabilize the foam head and create inconsistent results.
Choose Wet or Dry Skimming
Wet skimming produces lighter, more watery skimmate and removes dissolved organics quickly. Dry skimming produces darker, thicker waste with less liquid.
Choose the approach according to your aquarium’s needs and maintenance routine. Avoid judging performance solely by how quickly the cup fills.
For Darker Skimmate
Use a stable foam head that reaches the lower collection cup area gradually. Reduce excessive water movement when the cup fills too quickly.
Give the skimmer time to collect concentrated waste before making another adjustment. Patience usually produces better results than constant knob changes.
For Wetter Skimmate
Allow the foam to rise higher into the collection cup. Increase the internal water level carefully while monitoring the cup.
This approach can remove dissolved organic material faster. However, you will need to empty the cup more frequently.
Use the Controller During Feeding and Maintenance
Feeding can temporarily change surface tension and disrupt foam production. Pause or reduce the skimmer during feeding when necessary.
Similarly, pause the unit before performing maintenance inside the sump. This prevents unnecessary operation while your hands or tools enter the equipment chamber.
Restart the skimmer at its previous setting after feeding or maintenance. Then watch the foam before making any new adjustments.
Handle Common N100 Plus Problems
Most skimmer problems come from unstable water depth, excessive pump output, restricted airflow, or sudden water chemistry changes. Troubleshooting works best when you check those factors systematically.
Why Is the Skimmer Overflowing?
First, check whether the sump water depth exceeds the recommended range. Next, reduce pump power and observe the collection cup.
Also check for recent additives, medications, epoxy, or other substances that affect surface tension. Such changes can temporarily make foam extremely unstable.
Why Is There Too Much Foam?
Excessive foam usually indicates aggressive settings or unstable water conditions. Lower the pump output and let the skimmer settle.
Then verify the airflow path and confirm that the sump water level remains stable. Avoid making several adjustments simultaneously.
Why Does the Skimmer Produce Microbubbles?
Some microbubbles can appear during startup or after maintenance. First, confirm that the skimmer sits correctly and that all connections remain secure.
Then check the outlet path and internal water level. Persistent bubbles may indicate excessive turbulence or an adjustment problem.
Why Is There Little or No Skimmate?
Check the pump, air intake, water depth, and foam height first. A blocked air path can quickly reduce bubble production.
Also consider the aquarium’s current organic load. Very clean water can naturally produce less visible skimmate.
Build a Simple Maintenance Routine
Regular cleaning keeps the skimmer responsive and protects pump performance. A neglected neck or clogged air intake can gradually change foam behavior.
- Empty the collection cup before waste reaches the upper section.
- Rinse the cup and clean the neck regularly.
- Inspect the air tubing for salt buildup.
- Clean the air silencer when airflow becomes restricted.
- Inspect the pump and impeller for debris.
- Remove calcium deposits during deeper pump maintenance.
Clean components with aquarium-safe methods and fresh water. Avoid household cleaners because chemical residues can harm reef inhabitants.
Clean the Pump Carefully
Always disconnect power before removing or servicing the pump. Never handle powered aquarium equipment with wet hands.
Remove debris from the impeller and housing without damaging small components. Reassemble everything securely before returning the pump to service.
Avoid These Common Setup Mistakes
Many first-time users adjust the skimmer too aggressively. That approach often creates unstable foam and makes troubleshooting harder.
- Do not ignore the recommended sump water depth.
- Do not start with maximum pump power.
- Do not change several controls simultaneously.
- Do not judge performance immediately after every adjustment.
- Do not let the collection cup overflow repeatedly.
- Do not run the pump with a restricted air path.
Instead, change one variable and observe the response. This method gives you a repeatable baseline for future adjustments.
Match Skimmer Performance to Aquarium Bioload
The N100 Plus can serve different reef systems within its rated range. However, tank volume alone does not determine the correct skimming intensity.
A heavily stocked aquarium generally produces more dissolved organic waste. Consequently, it may need stronger and more consistent skimming than a lightly stocked system.
Observe your livestock, feeding routine, nutrient readings, and skimmate quality together. Those signals provide better guidance than maximum pump output.
How to Get More Consistent Results
Consistency matters more than chasing the darkest skimmate every day. Keep water depth stable and avoid unnecessary setting changes.
After cleaning, return the skimmer to your known baseline. Then adjust gradually if the foam behaves differently.
Keep your collection cup clean enough to maintain predictable foam movement. A dirty neck can change the point where foam collapses into waste.
Quick N100 Plus Setup Checklist
- Inspect the skimmer and pump before assembly.
- Connect the pump, air tubing, silencer, and collection cup.
- Place the unit inside a stable sump chamber.
- Maintain approximately 6.5 to 7.5 inches of water depth.
- Start the controller at a conservative pump setting.
- Check bubble production and foam stability.
- Adjust pump power in small increments.
- Fine-tune airflow only after water depth remains stable.
- Allow the foam head time to settle.
- Record your final settings for future maintenance.
Frequently Asked Questions
How deep should the MagTool N100 Plus sit?
The recommended water depth is approximately 6.5 to 7.5 inches for normal operation.
What tank size suits the N100 Plus?
The N100 Plus targets reef aquariums from 50 to 100 gallons, depending on bioload.
Should I run the pump at maximum power?
No, start lower and increase output gradually until the foam head becomes stable.
Why does my new skimmer overflow?
Check water depth, reduce pump output, and allow the skimmer time to stabilize.
How often should I clean the collection cup?
Clean it whenever accumulated skimmate begins affecting foam movement or approaches the cup’s capacity.
Final Thoughts
Using the MagTool N100 Plus successfully requires controlled setup rather than complicated technique. Correct water depth, gradual tuning, clean components, and stable conditions create the strongest foundation.
Start conservatively, observe the foam, and change one setting at a time. Once you find a stable baseline, record it and maintain the skimmer consistently.
If you are installing an N100 Plus now, use the checklist above during setup. Then fine-tune the pump and airflow until your reef system produces predictable, manageable skimmate.