How to Set Up Tetra 20 Gallon Complete Tropical Fish Tank Kit
Setting up the Tetra 20 Gallon Complete Tropical Fish Tank Kit takes a careful, step-by-step approach. The 20-gallon tank measures about 24 inches wide, 12 inches deep, and 16 inches high. Prepare the aquarium, rinse the substrate, install equipment, condition the water, cycle the tank, and then introduce compatible fish gradually.
For beginners, the Tetra 20 Gallon Complete Tropical Fish Tank Kit offers a practical starting point for freshwater fishkeeping. However, assembling the equipment correctly matters more than simply filling the tank. A stable setup protects fish from temperature swings, poor filtration, and dangerous water chemistry.
Key Takeaways
- Choose a strong, level surface before placing the glass aquarium.
- Rinse gravel and decorations thoroughly without using soap.
- Never operate the filter or heater before adding water.
- Condition tap water before introducing it into the aquarium.
- Cycle the aquarium before adding a full fish population.
- Test water parameters regularly during the first several weeks.
What You Need Before Starting
The kit supplies several major components, but you still need a few setup essentials. Prepare substrate, a water conditioner, an aquarium water test kit, and a clean bucket before beginning.
You should also keep a thermometer available for temperature checks during setup. Choose decorations carefully because sharp edges can injure fish or damage delicate fins.

Check the Kit Contents
Exact package contents can vary by product version or retailer, so inspect your specific box first. Typical components include the glass aquarium, hood, LED lighting, filtration equipment, and basic accessories.
Some versions or listings may include a heater and thermometer, while others can differ. Therefore, confirm every component before purchasing additional equipment.
- 20-gallon glass aquarium
- Low-profile hinged hood with LED lighting
- Tetra filtration system and filter cartridge
- Heater and thermometer when included with your version
- Basic decorative accessories or plants
- Water conditioner and fish food samples on applicable versions
Choose the Right Location
Start by selecting the aquarium’s permanent location before adding anything inside. A filled 20-gallon aquarium becomes extremely heavy and should not move afterward.
Use a purpose-built aquarium stand or another properly rated support surface. The surface must remain level because uneven pressure can stress the aquarium seams.
Avoid These Locations
- Direct sunlight
- Radiators and heating vents
- Strong air-conditioning drafts
- Unstable furniture
- Areas with frequent temperature changes
- Locations without safe electrical access
Additionally, leave enough clearance behind the aquarium for cables and filtration equipment. Keep electrical connections higher than the aquarium whenever possible.
Clean the Tank and Accessories
Before adding substrate, rinse the aquarium and removable accessories with clean water. Never use household soap, detergent, bleach, or scented cleaning products.
These substances can leave residues that harm aquatic life even after rinsing. Instead, use plain water and a clean, unused bucket or sponge.
Rinse gravel separately until the water becomes noticeably clearer. This removes dust that could otherwise cloud the aquarium after filling.
Add and Arrange the Substrate
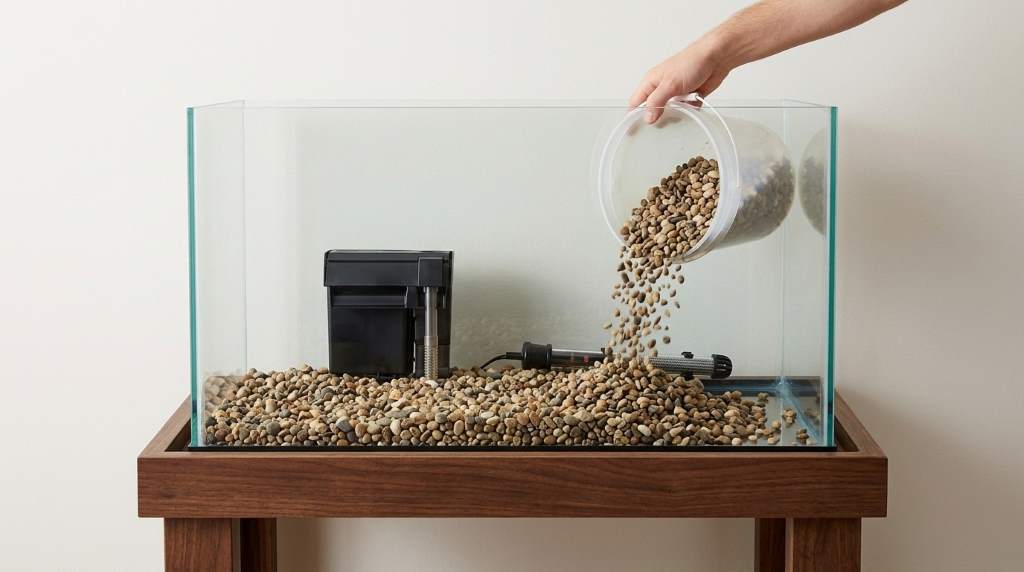
Place approximately 1 to 1.5 inches of thoroughly rinsed gravel across the aquarium floor. A moderate substrate layer supports decorations without creating unnecessary waste traps.
Create a gentle slope from the back toward the front for better visual depth. This arrangement also makes debris easier to notice during routine maintenance.
If you plan to use live plants, select substrate that suits their root systems. Otherwise, standard aquarium gravel works well for many beginner freshwater communities.
Position Decorations and Plants
Arrange decorations before filling the aquarium because moving them later can disturb the substrate. Keep open swimming areas around the center and front of the tank.
Place heavier ornaments directly on stable surfaces rather than balancing them loosely. Check every decoration for sharp edges, unstable pieces, or narrow openings.
Artificial plants offer simple maintenance for beginners, while live plants can provide additional habitat and visual interest. Either option works when you maintain appropriate water conditions.
Install the Filtration System
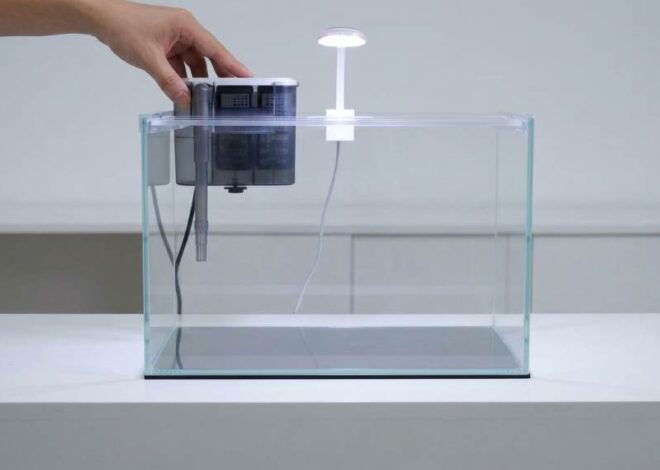
Position the included filter according to its equipment instructions and aquarium layout. Keep the intake unobstructed so water can circulate efficiently through the filtration system.
Do not plug the filter into an electrical outlet while the aquarium remains empty. Running a filter without adequate water can damage its motor.
After filling the aquarium, prime the filter according to its specific instructions. Confirm steady water movement before considering the filtration system operational.
Why Filtration Matters
The filter performs several important jobs throughout the aquarium’s daily operation. It captures suspended debris while supporting biological filtration through beneficial microorganisms.
However, a filter cannot instantly make a new aquarium biologically mature. The nitrogen cycle still needs time to establish a stable bacterial population.
Install the Heater and Thermometer
Tropical freshwater fish generally require stable warmth, so temperature control deserves careful attention. Install the heater according to its manufacturer’s required water level and placement.
If your kit includes a heater, inspect it for damage before installation. If your version lacks one, purchase a properly rated aquarium heater separately.
Keep the heater away from gravel and decorations that could restrict water circulation. Position the thermometer where you can easily read it during daily checks.
Never power a submersible heater while it remains outside the water. Allow equipment to cool before removing it from an operating aquarium.
Fill the Aquarium Safely
Place a clean plate, saucer, or similar object over the substrate before adding water. Then pour water gently onto that surface to prevent substrate disturbance.
Use tap water treated with an appropriate aquarium water conditioner. Chlorine and chloramine can damage fish and beneficial microorganisms in untreated water.
Fill the aquarium to the recommended level without submerging equipment beyond its specified limits. Leave sufficient space for the hood and normal water movement.
Start the Equipment
Once the aquarium reaches its operating water level, start the filter and heater. Then switch on the LED lighting and verify that each component functions correctly.
Create drip loops in electrical cords before connecting equipment to outlets. A drip loop helps prevent water from traveling along a cable toward an electrical connection.
Watch the filter for unusual noise, weak flow, or repeated stopping. Also verify that the heater maintains a consistent temperature instead of fluctuating sharply.
Cycle the Aquarium Before Adding Fish
The nitrogen cycle represents the most important step that many beginner setup guides underemphasize. Beneficial bacteria convert toxic ammonia into nitrite and eventually less-toxic nitrate.
A new aquarium usually needs time to establish this biological filtration. Therefore, do not treat clear water as proof that the aquarium is ready.
How to Check the Cycle
Use an aquarium test kit to monitor ammonia, nitrite, and nitrate during cycling. Record your readings so you can recognize trends instead of relying on appearance.
- Test ammonia regularly during the cycling period.
- Monitor nitrite as bacterial populations develop.
- Track nitrate as the cycle progresses.
- Perform water changes when testing indicates unsafe conditions.
- Add fish only after the aquarium demonstrates stable biological processing.
Beneficial bacterial products can support cycling, but they should not replace water testing. A test result provides stronger evidence than simply following a calendar.
Set the Lighting Schedule
The included LED lighting provides illumination for viewing fish and decorations. However, leaving aquarium lights on continuously encourages unnecessary algae growth.
Start with a consistent daily schedule and adjust it according to algae growth. Live plants may require different lighting needs than artificial decorations.
Keep the aquarium away from direct sunlight even when the LED remains controlled. Natural sunlight can add unwanted heat and encourage algae blooms.
Introduce Fish Gradually
Once your water parameters remain suitable, introduce fish gradually rather than filling the aquarium immediately. A slower stocking approach gives biological filtration time to adapt.
Choose peaceful species with compatible temperature, water, and behavioral requirements. Avoid combining fish simply because they look attractive together.
Float sealed transport bags when appropriate to reduce temperature differences before transferring fish. Follow safe acclimation practices recommended for the particular fish species.
Build a Balanced Community
A 20-gallon aquarium provides useful space for a carefully planned freshwater community. Still, available swimming space matters more than simply calculating total fish length.
Research adult size, temperament, activity level, and preferred swimming zone before purchasing fish. Consider bottom-dwelling, midwater, and surface species only when their requirements align.
Most importantly, add livestock progressively and monitor water chemistry after each addition. This approach reduces sudden biological pressure on the developing aquarium.
Common Setup Mistakes to Avoid
Several beginner mistakes can undermine an otherwise excellent aquarium setup. Fortunately, most problems become easy to prevent once you understand their causes.
- Adding fish immediately: New biological filters need time to establish.
- Using soap: Cleaning residues can harm aquatic organisms.
- Overfeeding: Excess food decomposes and increases waste.
- Overstocking: Too many fish can overwhelm filtration capacity.
- Skipping water tests: Clear water can still contain toxic compounds.
- Replacing filter media unnecessarily: Aggressive replacement can remove beneficial bacteria.
- Ignoring temperature: Tropical species need stable environmental conditions.
A Simple First-Month Maintenance Routine
During the first month, pay closer attention to water quality than aquarium appearance. Check temperature daily and test water regularly while the biological filter develops.
Remove visible debris and uneaten food promptly rather than allowing waste to accumulate. Perform appropriately sized water changes when testing or aquarium conditions indicate the need.
Clean equipment without destroying beneficial biological media. Never rinse biological filter media under untreated tap water when preserving established bacteria matters.
Weekly Checklist
- Check water temperature.
- Inspect filter flow.
- Test important water parameters.
- Remove visible waste.
- Inspect fish behavior and appearance.
- Clean algae from viewing surfaces when necessary.
How to Know Your Setup Is Working
A healthy aquarium should maintain stable temperature and consistent filter circulation. Fish should display normal activity, appetite, breathing, and interaction with their surroundings.
However, healthy-looking fish cannot replace water testing. Ammonia and nitrite problems can develop before obvious symptoms appear.
Therefore, combine observation with routine measurements and maintenance. This creates a much stronger system than relying on appearance alone.
Why This Setup Approach Works Better
Many aquarium guides focus mainly on assembling equipment and decorating the tank. A better approach treats setup as the beginning of biological stabilization.
The biggest improvement comes from separating mechanical setup from livestock introduction. You first establish equipment, then water chemistry, then biological stability, and finally stocking.
This sequence also prevents one common beginner mistake: assuming a complete kit means an instantly mature aquarium. The equipment simplifies assembly, but responsible fishkeeping still requires preparation and monitoring.
Frequently Asked Questions
How long should I wait before adding fish?
Wait until testing confirms that the aquarium has completed cycling and maintains safe ammonia and nitrite levels.
Can I use tap water in the Tetra aquarium?
Yes, but always treat tap water with an appropriate aquarium water conditioner before adding it.
Should I rinse aquarium gravel before using it?
Yes, rinse gravel thoroughly with clean water to remove dust and manufacturing debris.
Can I run the filter without water?
No, keep the filter properly filled and follow its operating instructions before powering it.
Does a complete kit eliminate every additional purchase?
No, you may still need substrate, testing supplies, maintenance tools, or a heater depending on your kit version.
Final Thoughts
Setting up this Tetra aquarium successfully requires more than assembling the included equipment. Give equal attention to stable placement, treated water, correct filtration, temperature control, cycling, and gradual stocking.
Start slowly, test consistently, and resist the temptation to rush the first fish addition. Follow this sequence carefully, and your 20-gallon aquarium can become a stable, attractive freshwater habitat.
Ready to begin? Gather your substrate, conditioner, test kit, and clean equipment before setting up the aquarium. Then complete each stage methodically and verify water conditions before adding livestock.