How to Set Up Tetra Half Moon 3 Gallon Fish Tank
Setting up a Tetra Half Moon 3 Gallon Fish Tank takes careful preparation, not simply adding water and fish. The aquarium holds 3 gallons and measures approximately 12.9 by 6.8 by 12.5 inches. With proper equipment, cycling, stocking, and maintenance, this compact aquarium can become a stable freshwater habitat.
Key Takeaways
- Place the tank on a level, sturdy surface before adding equipment or water.
- Rinse gravel and decorations with plain water, never soap or household cleaners.
- Assemble the Whisper filter, airline tubing, air pump, and LED airstone correctly.
- Treat tap water with aquarium-safe conditioner before adding livestock.
- Cycle the aquarium before introducing fish to establish beneficial biological filtration.
- Choose livestock according to adult size, behavior, activity, and waste production.
Understand the Tank Before You Start

The Half Moon design creates a curved viewing area while keeping the aquarium footprint compact. Its current kit configuration includes an internal Whisper filter, Bio-Bag cartridge, bubbling LED airstone, air pump, tubing, and canopy.
However, the compact volume leaves little room for mistakes in water quality. Therefore, careful cycling and consistent maintenance matter more than decorative complexity in this aquarium.
The acrylic construction also requires gentler cleaning habits than many glass aquariums. Consequently, use soft cleaning materials and keep sharp gravel away from the curved viewing panel.
Gather Everything Before Assembly
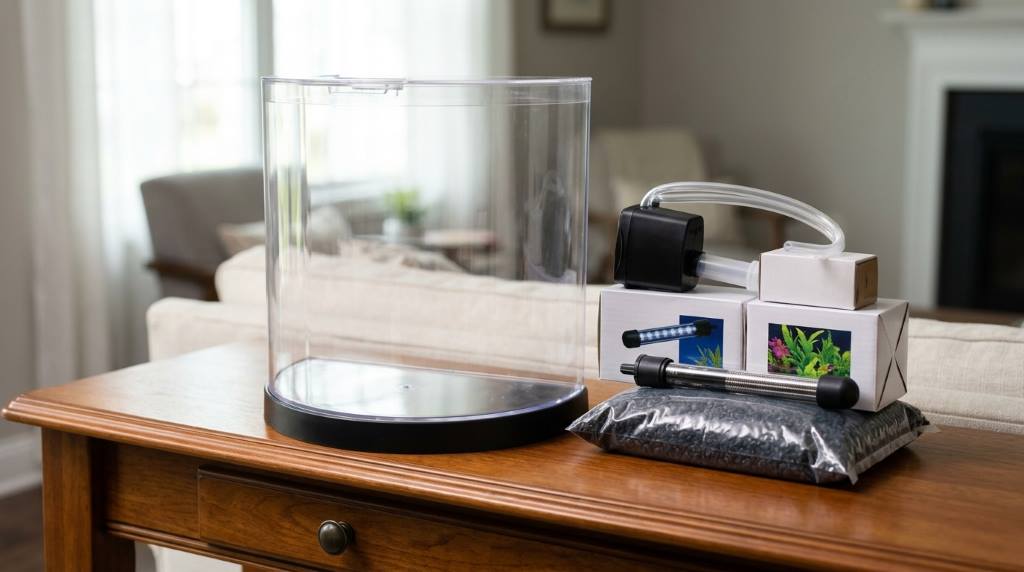
First, unpack every component and inspect each piece for damage or missing parts. Then, place the tank, filter, air pump, tubing, LED airstone, cartridge, lid, and valves nearby.
You will also need several items that may not come inside the basic kit. Prepare aquarium gravel, decorations, water conditioner, a thermometer, a bucket, and a siphon.
If you plan to keep tropical livestock, add an appropriately sized adjustable heater and reliable temperature monitoring. A heater matters because room temperature can fluctuate substantially throughout the day.
- 3-gallon Half Moon aquarium and lid
- Whisper internal filter and compatible cartridge
- Air pump and airline tubing
- LED bubbling airstone and valve assembly
- Aquarium-safe gravel and decorations
- Water conditioner and aquarium test kit
- Thermometer and suitable heater when required
- Bucket, siphon, and soft aquarium cleaning pad
Choose the Right Location
Position the aquarium on a sturdy, level surface that can support its filled weight. Never place it on an unstable shelf, narrow ledge, or surface designed only for lightweight decorations.
Next, keep the aquarium away from direct sunlight, heating vents, air conditioners, and frequently opened exterior doors. Stable surroundings help reduce temperature swings and excessive algae growth.
Leave enough clearance around the tank for filter access and routine water changes. Also, keep electrical connections higher than the aquarium whenever practical.
Clean the Tank and Substrate
Before assembly, rinse the aquarium interior with clean water and a soft, lint-free cloth. Avoid soap, detergents, disinfectants, and household glass cleaners because residues can harm aquatic life.
Rinse gravel thoroughly until the water becomes reasonably clear. Likewise, rinse decorations before placing them inside the aquarium.
Do not scrub the acrylic with abrasive pads or rough materials. Small scratches can accumulate over time and make the curved panel look cloudy.
Build the Internal Filter
Install the Filter Cartridge
Start by pressing the diffuser tube into the bottom of the filter housing. Then rinse the filter cartridge before inserting it into the housing.
Attach the airline tubing to the diffuser tube inlet and connect its opposite end to the valve assembly. Finally, secure the filter against the aquarium’s back wall using its suction cups.
Position the filter carefully so the lid can sit correctly after installation. The official setup instructions specifically place the filter toward the rear wall.
Connect the LED Airstone
Attach the second airline tube to the LED airstone inlet. Connect the opposite end to the remaining valve on the six-inch valve assembly.
Place the airstone securely on the aquarium floor before adding enough gravel to hold it down. The manufacturer recommends burying the airstone edges with gravel to keep it positioned.
Connect the Air Pump Safely
The air pump powers both the filtration system and bubbling airstone in the standard configuration. Therefore, arrange the airline connections before plugging anything into an electrical outlet.
If the pump sits above the aquarium water level, position it safely away from possible splashes. The manufacturer’s instructions recommend keeping it at least 12 inches above the waterline without a check valve.
If the pump must sit below the aquarium water level, install a suitable check valve. This prevents water from traveling backward through the airline during power interruptions or equipment removal.
Always create drip loops with electrical cords before they reach the outlet. Never allow water running along a cord to reach an electrical receptacle.
Add Gravel, Decorations, and Water
Place a modest layer of rinsed gravel across the aquarium floor. Avoid creating an excessively deep substrate layer because the tank has limited internal volume.
Arrange decorations around open swimming areas rather than filling the entire aquarium. Choose smooth ornaments without sharp edges that could damage fins or trap smaller livestock.
Next, add room-temperature tap water treated with aquarium-safe water conditioner. Fill the aquarium until the water reaches the filter spillway level specified by the manufacturer.
Pour water slowly over a clean dish or similar surface when possible. This approach reduces substrate disturbance and keeps the newly arranged decorations in place.
Start the Equipment in the Correct Order
After filling the aquarium, install the lid while routing the airline tubes through its designated opening. Then confirm that every connection remains secure and properly positioned.
Before starting, make sure the air pump and airstone remain outside the water where required. Never operate electrical equipment without the aquarium containing enough water for proper operation.
Open the airstone valve fully during initial startup to help establish airflow. Then gradually adjust both valves until the bubbles and filter flow remain gentle.
Watch the filter for several minutes after startup. Confirm that water moves through the filter and returns smoothly without excessive splashing.
Cycle the Aquarium Before Adding Fish
The most important step that beginners often skip involves biological cycling. A new aquarium lacks enough beneficial bacteria to safely process fish waste.
During cycling, beneficial bacteria establish inside the filter media and other suitable surfaces. These bacteria help convert toxic ammonia into nitrite and eventually less harmful nitrate.
Use an aquarium test kit to monitor ammonia, nitrite, and nitrate during the process. Do not add fish simply because the water looks clear.
A fishless cycle provides a safer approach because it avoids exposing livestock to dangerous ammonia and nitrite spikes. Follow your chosen cycling method consistently and test regularly.
Choose Livestock Carefully
A three-gallon aquarium provides limited swimming space and limited capacity for biological waste. Therefore, stocking decisions deserve more attention than the tank’s attractive appearance.
Never use the old one-inch-per-gallon rule as your only stocking calculation. Fish behavior, adult size, swimming requirements, territorial needs, and waste production matter too.
Most importantly, do not treat the manufacturer’s historical stocking guidance as permission to overstock. A goldfish requires substantially more long-term space than this aquarium provides.
For many keepers, a carefully selected single nano-compatible inhabitant can simplify maintenance. However, species requirements should always take priority over appearance or convenience.
Consider Temperature Requirements
If your chosen livestock requires tropical temperatures, install an appropriate adjustable heater before introducing the animal. Monitor the water temperature rather than relying on household room temperature.
Position the heater where water circulates around it without touching decorations or the acrylic walls. Follow the heater manufacturer’s wattage, clearance, and safety instructions.
Introduce Livestock Without Shock
Once the aquarium completes cycling, acclimate new livestock gradually instead of releasing it immediately. Match temperature and slowly introduce aquarium water according to the livestock supplier’s acclimation guidance.
Keep the aquarium lighting subdued during the initial transition when appropriate. Reduced stimulation can help newly introduced animals settle into their environment.
Feed lightly during the first several days and remove uneaten food promptly. In a three-gallon aquarium, excess food can quickly contribute to water-quality problems.
Manage Filter Flow for Small Fish
The included filtration system provides mechanical and biological filtration, while the air pump drives water movement.
Small fish may struggle when strong currents push them continuously around the aquarium. Therefore, adjust the valve until circulation remains effective without creating unnecessary turbulence.
Observe the livestock rather than judging flow strength only by appearance. If a fish constantly fights the current, reduce flow where the equipment allows adjustment.
Build a Practical Maintenance Routine
Small aquariums require disciplined maintenance because their limited water volume changes faster than larger systems. Test water regularly, especially after introducing livestock or changing feeding habits.
Perform partial water changes whenever testing or routine maintenance indicates they are necessary. Always match replacement water temperature closely and condition tap water before adding it.
Clean algae from acrylic surfaces with a soft aquarium-safe pad. Never use abrasive sponges, razor blades, or household cleaning products against the acrylic.
Clean filter media carefully using removed aquarium water when appropriate. Avoid washing beneficial biological media under untreated tap water because chlorine can damage useful bacteria.
Simple Weekly Checklist
- Check water temperature and livestock behavior.
- Test ammonia and nitrite when the aquarium remains newly established.
- Inspect filter flow and airline connections.
- Remove visible waste and uneaten food.
- Perform an appropriate partial water change.
- Clean algae gently from acrylic surfaces.
- Check decorations and equipment for movement or damage.
Common Setup Mistakes to Avoid
| Mistake | Why It Causes Problems | Better Approach |
|---|---|---|
| Adding fish immediately | The biological filter has not matured. | Cycle the aquarium and test water first. |
| Using untreated tap water | Chlorine or chloramine can harm aquatic life. | Use an appropriate aquarium water conditioner. |
| Overstocking the tank | Waste accumulates quickly in three gallons. | Choose livestock according to adult needs. |
| Overfeeding | Uneaten food increases organic waste. | Feed controlled portions and remove leftovers. |
| Scrubbing acrylic aggressively | Abrasive materials can create permanent scratches. | Use soft aquarium-safe cleaning materials. |
| Ignoring filter flow | Strong currents can stress small fish. | Adjust flow and observe livestock behavior. |
| Placing the pump incorrectly | Water can potentially siphon toward the pump. | Use proper positioning or a suitable check valve. |
How to Improve the Tank After Initial Setup
Once the aquarium stabilizes, prioritize function over decoration. Healthy water, appropriate temperature, gentle circulation, and suitable stocking matter more than elaborate aquascaping.
Live plants can provide cover and improve the visual environment when their care requirements match the aquarium. Choose compact species that fit the available space without blocking circulation.
Keep the curved front panel visually open so the aquarium retains its panoramic appeal. A few intentional decorations usually look cleaner than a crowded arrangement.
When Should You Replace the Filter Cartridge?
Follow the cartridge manufacturer’s replacement guidance while monitoring actual filter performance. Tetra’s instructions identify the small cartridge as a replaceable component for this kit.
However, avoid replacing every piece of biological media unnecessarily. Preserving established beneficial bacteria helps maintain biological stability during routine maintenance.
If flow decreases, first inspect the intake, cartridge condition, tubing, and diffuser. Cleaning appropriate components may restore performance without immediately replacing everything.
What Makes This Setup Work Long Term?
The secret lies in treating the aquarium as a living biological system rather than a decorative container. Every feeding, water change, filter adjustment, and stocking decision affects that system.
Consistency also beats aggressive maintenance. Small, planned interventions usually work better than large corrective changes after water quality deteriorates.
Keep a simple maintenance log if you are new to aquarium keeping. Record water tests, water changes, feeding changes, equipment issues, and livestock behavior.
Frequently Asked Questions
How long should I wait before adding fish?
Wait until the aquarium completes cycling and tests confirm safe ammonia and nitrite levels.
Does the Tetra Half Moon 3 Gallon include a heater?
No, the standard kit does not include a heater, so tropical livestock may require one separately.
Can I use tap water in this aquarium?
Yes, but always treat tap water with an appropriate aquarium water conditioner first.
How often should I clean a three-gallon aquarium?
Check water conditions regularly and perform partial changes according to test results and livestock needs.
Can I keep goldfish in a three-gallon tank?
No, goldfish need substantially more space and filtration than a three-gallon aquarium can provide.
Final Thoughts
Setting up this aquarium successfully requires more than assembling the equipment and filling the tank. Proper cleaning, safe equipment placement, water conditioning, biological cycling, and careful stocking create the foundation for success.
Start slowly, test the water, and resist adding livestock before the aquarium becomes biologically ready. Follow this setup process carefully, then build a simple maintenance routine that you can sustain.
With consistent care, your Half Moon aquarium can become an attractive and manageable freshwater display. Use the checklist above during setup, and make water quality your first priority.