How to Use an Aquarium Gravel Cleaner for Easy Tank Maintenance
Maintaining a clean and healthy aquarium is essential for the well-being of your fish and the overall aesthetic of your tank. One of the most important yet often overlooked aspects of aquarium maintenance is cleaning the gravel. Over time, uneaten food, fish waste, and other debris accumulate in the gravel, leading to poor water quality and potential health issues for your fish. That’s where an aquarium gravel cleaner comes in.
An aquarium gravel cleaner is a simple yet powerful tool that makes tank maintenance easier and more efficient. By using a gravel cleaner, you can remove debris from the substrate without disturbing your fish or disrupting the tank’s ecosystem. In this guide, you’ll learn how to use an aquarium gravel cleaner for easy tank maintenance, ensuring a clean and healthy environment for your aquatic pets.
Why Regular Gravel Cleaning is Essential for Your Aquarium
Regular gravel cleaning is crucial for maintaining a healthy and thriving aquarium. Over time, organic waste such as uneaten food, fish waste, and decaying plant matter accumulates in the gravel, creating a breeding ground for harmful bacteria and algae. According to a study published in the Journal of Aquatic Animal Health, poor water quality due to inadequate tank maintenance is one of the leading causes of fish stress and disease.
Aquarium gravel cleaners help remove this debris, preventing the buildup of ammonia, nitrite, and nitrate—compounds that can be toxic to your fish. By keeping your gravel clean, you improve water quality, reduce the risk of algae outbreaks, and create a healthier environment for your aquatic pets. Additionally, regular gravel cleaning enhances the aesthetic appeal of your tank, making it more enjoyable to observe and maintain.
Understanding How an Aquarium Gravel Cleaner Works
An aquarium gravel cleaner, also known as a gravel vacuum, is designed to remove debris from the substrate while performing a partial water change. The cleaner works by creating a siphon that draws water and debris out of the tank. As the water flows through the gravel cleaner, heavier debris is trapped in the gravel, while lighter particles are sucked out and removed from the tank.
Most aquarium gravel cleaners consist of the following components:
- A Siphon Tube: This tube creates the suction needed to draw water and debris out of the tank.
- A Gravel Tube: This tube is placed in the gravel and has a wider opening to allow water to flow through while trapping debris.
- A Drain Hose: This hose directs the water and debris from the gravel tube to a bucket or drain.
- A Flow Control Valve: This valve allows you to adjust the suction strength, preventing the gravel from being sucked up with the debris.
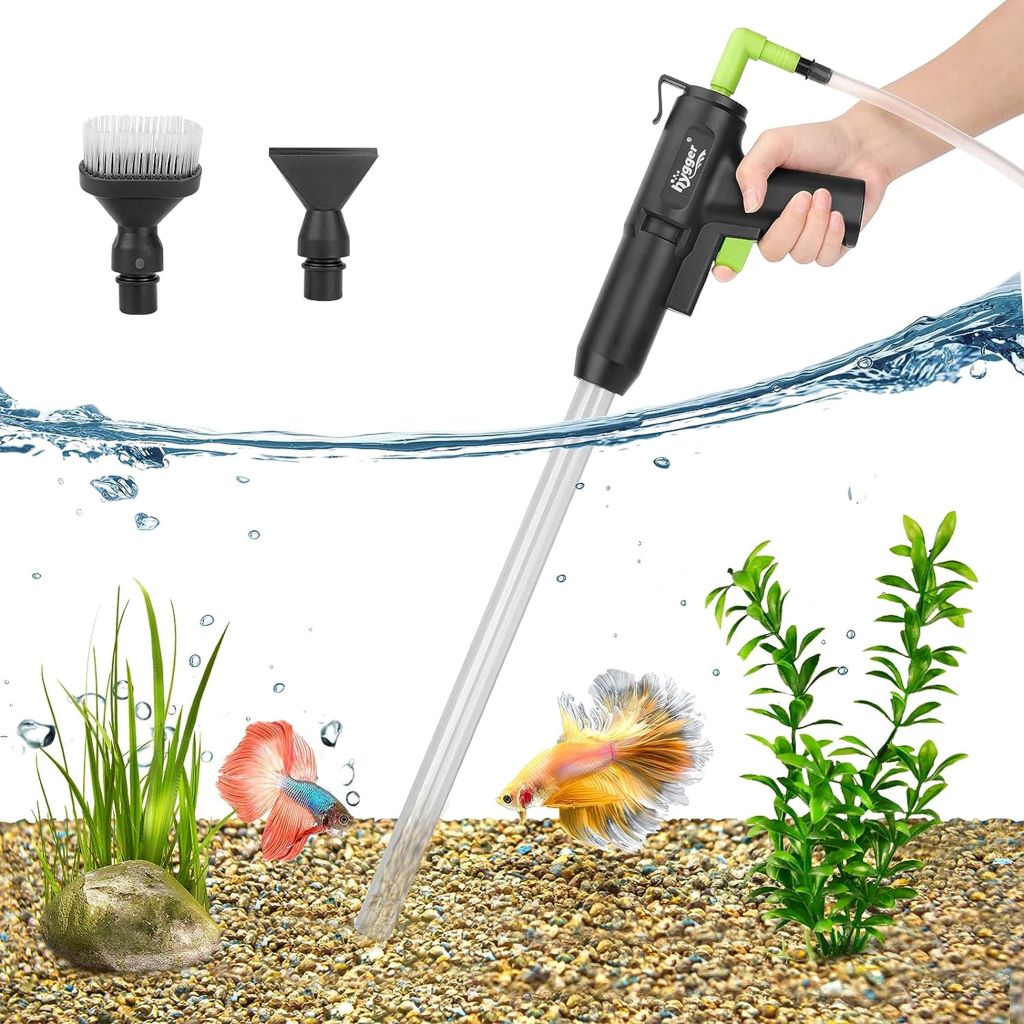
Gravel cleaners are available in various sizes and designs, including manual and battery-powered models. Manual gravel cleaners require you to start the siphon by sucking on the tube or using a siphon starter, while battery-powered models use a pump to create the siphon automatically.
Step-by-Step Guide to Using an Aquarium Gravel Cleaner
Using an aquarium gravel cleaner is a straightforward process, but it’s important to follow the correct steps to ensure effective cleaning without disturbing your fish or tank decor. Here’s a step-by-step guide to help you get started:
Step 1: Prepare Your Equipment
Before you begin, gather all the necessary equipment:
- An aquarium gravel cleaner
- A bucket or container to collect the dirty water
- A water conditioner (if you plan to replace the removed water)
- A net or container to temporarily hold your fish (if needed)
Ensure your gravel cleaner is clean and free of debris before use. If you’re using a manual gravel cleaner, make sure the siphon tube and gravel tube are securely connected.
Step 2: Start the Siphon
If you’re using a manual gravel cleaner, you’ll need to start the siphon. There are a few ways to do this:
- Suck on the Tube: Place the gravel tube in the tank and the drain hose in the bucket. Suck on the siphon tube until water begins to flow, then quickly move the tube to the bucket to avoid swallowing any water.
- Use a Siphon Starter: Some gravel cleaners come with a siphon starter or primer bulb that makes it easier to initiate the flow without sucking on the tube.
- Submerge the Tube: Fully submerge the gravel cleaner in the tank, then lift the drain hose above the water level to start the siphon.
For battery-powered gravel cleaners, simply place the gravel tube in the tank and turn on the pump to start the siphon.
Step 3: Clean the Gravel
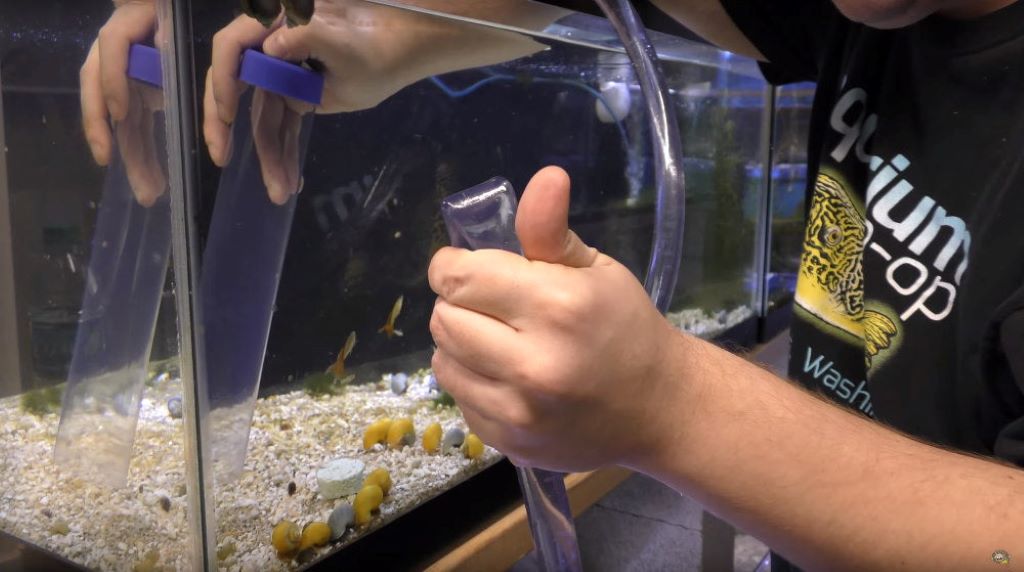
Once the siphon is started, place the gravel tube in the substrate. Gently push the tube into the gravel, allowing the water to flow through and carry away debris. Move the tube slowly across the gravel, focusing on one section at a time. Avoid pressing too hard, as this can disturb the gravel and release trapped debris.
As you clean, you’ll notice the water in the bucket becoming dirty. This is a sign that the gravel cleaner is effectively removing waste from the substrate.
Step 4: Perform a Partial Water Change
While cleaning the gravel, you’ll also be removing water from the tank. Aim to remove about 10–25% of the tank’s water during each cleaning session. This partial water change helps maintain water quality by diluting accumulated toxins and replenishing essential minerals.
Step 5: Refill the Tank
Once you’ve finished cleaning the gravel and performing the water change, refill the tank with fresh, dechlorinated water. Use a water conditioner to remove chlorine and chloramine from tap water, and match the temperature of the new water to the tank to avoid stressing your fish.
Step 6: Clean and Store Your Gravel Cleaner
After use, rinse your gravel cleaner with fresh water to remove any remaining debris. Allow it to air dry before storing it in a clean, dry place. Regular cleaning and maintenance of your gravel cleaner will extend its lifespan and ensure it remains effective.
Tips for Effective Gravel Cleaning
To make the most of your aquarium gravel cleaner and keep your tank in top condition, follow these tips:
- Clean Regularly: Aim to clean your gravel at least once every two weeks, or more frequently if you have a heavily stocked tank or fast-growing algae.
- Focus on High-Traffic Areas: Pay special attention to areas where debris tends to accumulate, such as under decorations, near the filter, and around feeding zones.
- Avoid Overcleaning: While it’s important to keep your gravel clean, avoid overcleaning, as this can disrupt the beneficial bacteria that live in the substrate.
- Use a Net: If your fish are particularly curious or skittish, use a net to gently guide them away from the gravel cleaner to prevent stress or injury.
- Monitor Water Parameters: Regularly test your water for ammonia, nitrite, nitrate, and pH levels to ensure your cleaning routine is maintaining a healthy environment.
Common Mistakes to Avoid When Using an Aquarium Gravel Cleaner
While using an aquarium gravel cleaner is relatively simple, there are some common mistakes that can reduce its effectiveness or even harm your fish. Here are a few to avoid:
- Disturbing the Gravel Too Much: Pressing the gravel cleaner too deeply into the substrate can release trapped debris and create clouds of waste, which can stress your fish and reduce water quality.
- Removing Too Much Water: Performing overly large water changes can disrupt the balance of your tank’s ecosystem. Stick to removing 10–25% of the water during each cleaning session.
- Using Dirty Equipment: Always rinse your gravel cleaner before and after use to prevent the introduction of contaminants or the spread of algae and bacteria.
- Ignoring Water Temperature: When refilling your tank, ensure the new water matches the temperature of the tank water to avoid shocking your fish.
- Skipping Water Conditioner: Tap water contains chlorine and chloramine, which are harmful to fish. Always use a water conditioner when refilling your tank.
Personal Experience: How an Aquarium Gravel Cleaner Transformed My Tank Maintenance
When I first started keeping an aquarium, I underestimated the importance of regular gravel cleaning. I would occasionally stir the gravel with a net, thinking it was enough to keep the tank clean. However, I soon noticed that my water was cloudy, and my fish seemed less active than usual. After testing the water, I discovered high levels of nitrate and phosphate, which were contributing to algae growth and poor fish health.
Determined to improve the condition of my tank, I invested in a high-quality aquarium gravel cleaner. The difference was immediate. Within just a few cleaning sessions, the water clarity improved dramatically, and my fish became more active and vibrant. The gravel cleaner made it easy to remove debris from the substrate without disturbing my fish or decor, and the partial water changes helped maintain stable water parameters.
This experience taught me the importance of regular gravel cleaning and the value of using the right tools. An aquarium gravel cleaner not only simplifies tank maintenance but also creates a healthier and more enjoyable environment for both you and your fish.
Frequently Asked Questions
How often should I clean my aquarium gravel?
You should clean your aquarium gravel at least once every two weeks. If you have a heavily stocked tank or notice a buildup of debris, you may need to clean it more frequently.
Can I use an aquarium gravel cleaner in a planted tank?
Yes, you can use an aquarium gravel cleaner in a planted tank, but you should be gentle to avoid disturbing the roots of your plants. Focus on cleaning the areas between plants and avoid pressing the gravel tube too deeply into the substrate.
Do I need to remove my fish when using a gravel cleaner?
No, you don’t need to remove your fish when using a gravel cleaner. However, some fish may be curious or skittish, so use a net to gently guide them away from the cleaning area if necessary.
Can I use a gravel cleaner for a saltwater aquarium?
Yes, you can use a gravel cleaner for a saltwater aquarium. The process is the same as for freshwater tanks, but be sure to use a gravel cleaner designed for saltwater use to avoid corrosion and other issues.
How do I know if my gravel cleaner is working properly?
You’ll know your gravel cleaner is working properly if you see debris being sucked out of the gravel and into the bucket. The water in the bucket should become visibly dirty as you clean, indicating that waste is being removed from the tank.
Conclusion
Using an aquarium gravel cleaner is one of the simplest yet most effective ways to maintain a clean and healthy aquarium. By following the steps and tips outlined in this guide, you can keep your gravel free of debris, improve water quality, and create a thriving environment for your fish.
Regular gravel cleaning not only enhances the aesthetic appeal of your tank but also reduces the risk of algae outbreaks and fish stress. Whether you’re a beginner or an experienced hobbyist, an aquarium gravel cleaner is an essential tool for easy and efficient tank maintenance.
Now that you’re equipped with the knowledge to use an aquarium gravel cleaner effectively, it’s time to put it into practice and enjoy a cleaner, healthier aquarium!
What’s your favorite tip for using an aquarium gravel cleaner? Share your experiences or ask any questions in the comments below!