
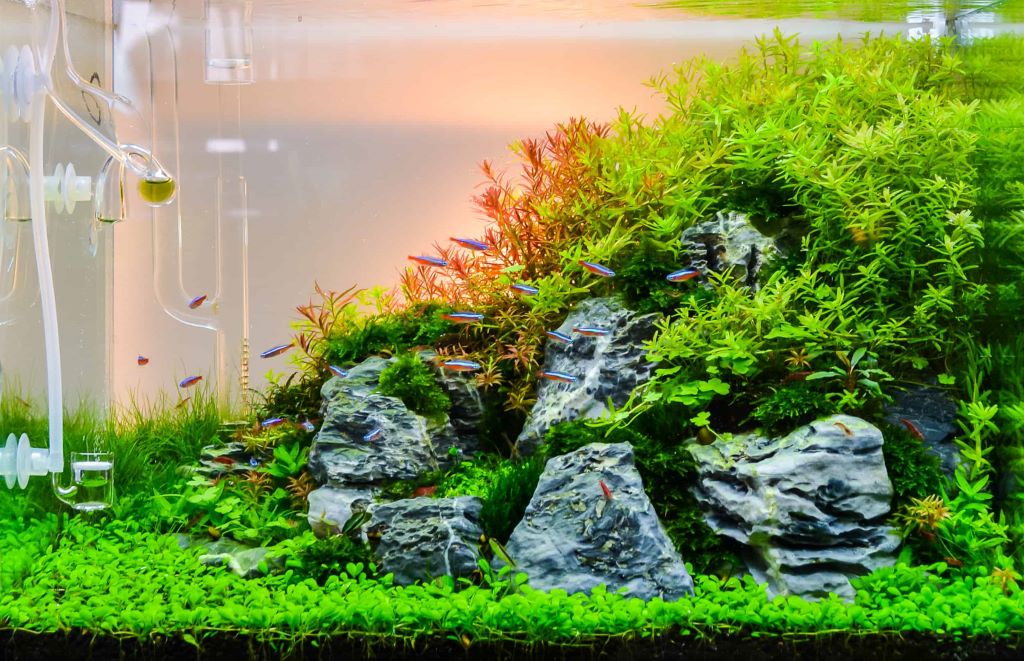
How to Select the Best Aquarium Rocks for Aquascaping
Aquascaping is the art of creating stunning underwater landscapes that mimic natural environments. While plants and fish often steal the spotlight, the foundation of any great aquascape is the hardscape—rocks, driftwood, and substrate that give your tank structure and character. Among these, rocks play a crucial role in defining the layout, providing hiding spots for fish, and supporting plant growth.
Choosing the right rocks is more than just picking what looks good. The wrong rocks can alter your water chemistry, harm your fish, or even crumble over time. The right rocks, however, can transform your tank into a thriving, natural-looking ecosystem. Whether you’re a beginner or an experienced aquascaper, understanding how to select the best aquarium rocks will help you create a tank that’s both beautiful and functional.
If you’re searching for the perfect aquarium rocks to bring your aquascape to life, this guide will walk you through everything you need to know.
Why Rocks Matter in Aquascaping
Rocks are the backbone of any aquascape. They provide visual interest, create natural barriers, and offer shelter for fish and invertebrates. According to a 2023 study published in the Journal of Aquatic Plant Biology, well-structured hardscapes can reduce stress in fish by up to 40%, as they mimic the natural hiding spots and territories found in wild habitats.
Rocks also play a practical role in your tank:
- Biological Filtration: Rocks provide surface area for beneficial bacteria to colonize, helping to break down waste and maintain water quality.
- Plant Anchoring: Many plants, such as Java fern and Anubias, attach naturally to rocks, creating a more natural look.
- Water Chemistry: Some rocks can buffer pH or release minerals, which can be beneficial or harmful depending on your tank’s needs.
- Aesthetic Appeal: Rocks add texture, depth, and contrast to your aquascape, making it more visually appealing.
I remember my first attempt at aquascaping. I chose rocks based solely on appearance, only to find that they crumbled after a few months and altered my water chemistry. After researching and selecting the right types of rocks, my tank transformed into a stable, thriving ecosystem. The right rocks made all the difference in both the health and beauty of my aquarium.
Types of Aquarium Rocks
1. Dragon Stone
Dragon stone is a favorite among aquascapers for its unique, jagged appearance and light weight. It’s a type of limestone that’s been weathered over time, giving it a dramatic, almost otherworldly look. Dragon stone is relatively inert, meaning it won’t significantly alter your water chemistry.
- Best for: Creating dramatic, mountainous landscapes or focal points in your tank.
- Pros: Lightweight, visually striking, and easy to stack.
- Cons: Can be expensive and may have sharp edges that need sanding.
2. Seiryu Stone
Seiryu stone is a type of Japanese rock known for its blue-gray color and intricate, layered texture. It’s often used in Iwagumi-style aquascapes, where minimalism and natural beauty are key. Seiryu stone is also relatively inert, making it safe for most aquariums.
- Best for: Iwagumi layouts, creating a natural, serene look.
- Pros: Beautiful texture, neutral pH impact, and versatile for various layouts.
- Cons: Can be pricey and may require careful arrangement to avoid toppling.
3. Ohko Stone (Dragon Stone’s Cousin)
Ohko stone, also known as “holey rock,” is similar to dragon stone but with more pronounced holes and cavities. It’s lightweight and provides plenty of hiding spots for fish and shrimp. Ohko stone is also inert and won’t affect water chemistry.
- Best for: Creating caves and hiding spots for fish and invertebrates.
- Pros: Lightweight, full of natural hiding spots, and easy to work with.
- Cons: Can be fragile and may break if handled roughly.
4. Slate
Slate is a flat, smooth rock that’s ideal for creating terraced landscapes or layered hardscapes. It’s inert and won’t alter water chemistry, making it a safe choice for most tanks. Slate is also durable and can be stacked easily.
- Best for: Creating terraces, steps, or layered designs.
- Pros: Durable, inert, and easy to stack.
- Cons: Can be heavy and may require careful balancing.
5. Lava Rock
Lava rock is a porous, lightweight rock that’s excellent for biological filtration. Its rough surface provides plenty of space for beneficial bacteria to grow, making it a great choice for planted tanks. Lava rock is also inert and won’t affect water chemistry.
- Best for: Planted tanks, biological filtration, and creating natural-looking landscapes.
- Pros: Lightweight, porous for bacterial growth, and inert.
- Cons: Can be sharp and may require rinsing to remove dust.
6. Texas Holey Rock
Texas holey rock is a type of limestone known for its unique, Swiss-cheese-like appearance. It’s a popular choice for cichlid tanks, as it provides plenty of hiding spots and territories. However, because it’s a type of limestone, it can raise the pH and hardness of your water, making it best suited for African cichlids or other hard-water species.
- Best for: Cichlid tanks, creating caves and territories.
- Pros: Unique appearance, great for cichlids, and durable.
- Cons: Can alter water chemistry and is heavier than other rocks.
7. Pagoda Stone
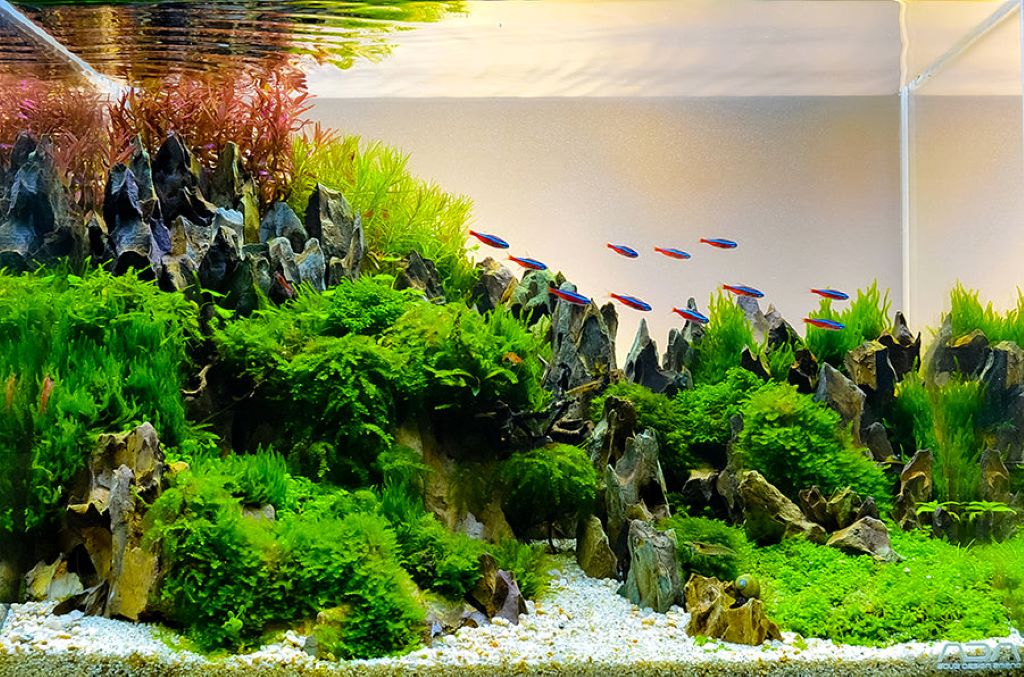
Pagoda stone is a type of shale rock with a distinctive, layered appearance. It’s often used in Asian-style aquascapes for its natural, pagoda-like shape. Pagoda stone is inert and won’t affect water chemistry.
- Best for: Asian-inspired aquascapes, creating vertical interest.
- Pros: Unique appearance, inert, and lightweight.
- Cons: Can be fragile and may break if mishandled.
8. Sandstone
Sandstone is a soft, sedimentary rock that’s often used in natural-style aquascapes. It’s inert and won’t alter water chemistry, but it can be more prone to crumbling over time. Sandstone is best for low-energy tanks where it won’t be disturbed frequently.
- Best for: Natural-style layouts, soft-water tanks.
- Pros: Natural appearance, inert, and lightweight.
- Cons: Can crumble or wear down over time.
How to Choose the Right Rocks for Your Aquascape
1. Consider Your Tank’s Water Chemistry
Some rocks, like limestone or Texas holey rock, can raise the pH and hardness of your water. If you have soft-water species like discus or tetras, avoid these rocks. Instead, opt for inert rocks like dragon stone, seiryu stone, or slate.
2. Match Rocks to Your Aquascape Style
Different aquascaping styles call for different types of rocks:
- Iwagumi: Uses minimal, carefully arranged rocks (often seiryu stone or dragon stone) to create a serene, natural look.
- Nature Style: Incorporates a variety of rocks and driftwood to mimic a natural underwater landscape.
- Dutch Style: Focuses on plants, with rocks used sparingly for accent or structure.
- Biotope Style: Uses rocks and materials native to a specific region to recreate a natural habitat.
3. Think About Size and Scale
The size of your rocks should be proportional to your tank. In smaller tanks, use smaller rocks to avoid overwhelming the space. In larger tanks, larger rocks can create dramatic focal points. A good rule of thumb is to use one or two large rocks as focal points, with smaller rocks to fill in the gaps.
4. Test for Safety
Before adding rocks to your tank, test them for safety:
- Boil or Soak: Boil rocks for 10–15 minutes or soak them in hot water to kill any bacteria or parasites. This also helps remove dirt and debris.
- Vinegar Test: Pour vinegar on the rock. If it fizzes, the rock contains calcium carbonate (like limestone) and will raise your pH. If it doesn’t fizz, it’s inert and safe for most tanks.
- Rinse Thoroughly: Rinse rocks under running water to remove any remaining dirt or debris.
5. Arrange for Stability
When placing rocks in your tank, arrange them so they’re stable and won’t topple. Start with larger rocks at the bottom and build upward, using smaller rocks to fill gaps and create a natural look. Avoid stacking rocks too high, as this can create unstable structures that may collapse.
How to Arrange Rocks in Your Aquarium
1. Plan Your Layout
Before placing rocks in your tank, sketch out a rough design or arrange them on a flat surface to visualize how they’ll look. Consider the “rule of thirds” for creating balanced, visually appealing layouts.
2. Create Focal Points
Use one or two larger rocks as focal points, placing them slightly off-center for a natural look. Surround them with smaller rocks to create depth and texture.
3. Build Terraces or Caves
Use flat rocks like slate to create terraces or steps, which add visual interest and provide hiding spots for fish. Stack rocks to form caves or overhangs, but ensure they’re stable and won’t collapse.
4. Anchor Plants
Attach plants like Java fern, Anubias, or moss to rocks using fishing line or aquarium-safe glue. This creates a more natural look and helps plants establish themselves in your tank.
5. Leave Space for Fish
Avoid overcrowding your tank with rocks. Leave plenty of open space for fish to swim and explore. Rocks should enhance your aquascape, not dominate it.
Common Mistakes to Avoid
1. Using Unsafe Rocks
Avoid rocks that can alter water chemistry or leach harmful substances. Always test rocks before adding them to your tank.
2. Overcrowding the Tank
Too many rocks can make your tank look cluttered and leave little space for fish to swim. Aim for a balanced layout with plenty of open areas.
3. Ignoring Stability
Unstable rock formations can topple and damage your tank or harm your fish. Always arrange rocks so they’re secure and balanced.
4. Skipping the Rinse or Boil Step
Failing to clean rocks before adding them to your tank can introduce dirt, bacteria, or parasites. Always boil or soak rocks and rinse them thoroughly.
5. Choosing Rocks Based Only on Appearance
While aesthetics are important, functionality matters too. Consider the needs of your fish and plants when selecting rocks.
FAQs About Aquarium Rocks
How do I clean aquarium rocks before adding them to my tank?
Boil rocks for 10–15 minutes or soak them in hot water to kill bacteria and remove dirt. Rinse them thoroughly under running water before adding them to your tank.
Can I use rocks from outside in my aquarium?
Yes, but test them first for safety. Avoid rocks that fizz in vinegar (indicating calcium carbonate) or those that may contain metals or toxins. Always boil or soak outdoor rocks before use.
What’s the best rock for a planted tank?
Dragon stone, seiryu stone, and lava rock are excellent choices for planted tanks. They’re inert, provide surface area for plant attachment, and won’t alter water chemistry.
How do I stack rocks safely in my aquarium?
Start with larger, flatter rocks at the bottom and build upward with smaller rocks. Ensure the formation is stable and won’t topple. Avoid stacking rocks too high.
Can I mix different types of rocks in my aquascape?
Yes, mixing rocks can create a more natural and visually interesting layout. Just ensure all rocks are safe for your tank’s water chemistry and inhabitants.
Conclusion
Selecting the best aquarium rocks for aquascaping is a blend of art and science. By understanding the types of rocks available, their impact on water chemistry, and how to arrange them effectively, you can create a stunning, functional aquascape that thrives for years.
The right rocks not only enhance the beauty of your tank but also provide a healthy environment for your fish and plants. Share your favorite aquascaping tips or ask questions in the comments below—let’s help each other build breathtaking underwater worlds!