How to Use Seachem Flourish Glue Safely
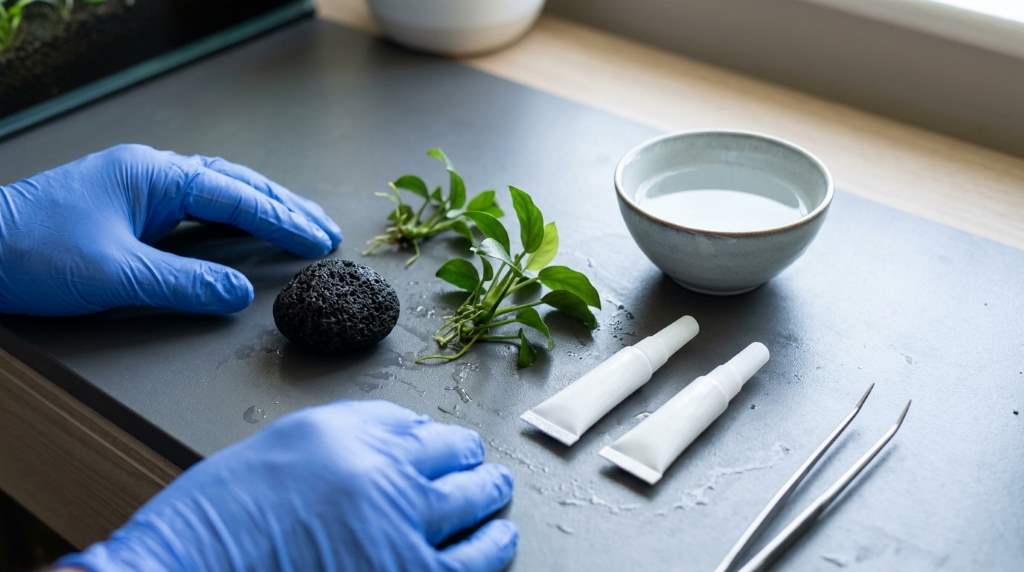
Use Seachem Flourish Glue sparingly, press the plant against clean hardscape for 20 seconds, and let the bond set fully. The cyanoacrylate gel works underwater, but careful handling protects both aquarium livestock and your hands. Seachem Flourish Glue comes in two 4-gram tubes, giving you 8 grams total per package. Seachem specifically recommends applying only a small amount before each use. The product suits freshwater and saltwater aquascaping, including moss, plants, rocks, driftwood, and gravel. However, safe use depends on placement, dosage, curing, and personal handling.
Key Takeaways
- Use only a small amount of glue for each plant attachment.
- Press the plant against the surface for approximately 20 seconds.
- Keep fish and invertebrates away until the adhesive fully sets.
- Never use Flourish Glue to attach objects directly to aquarium glass.
- Drying the bonding surfaces first can improve control and attachment.
- Protect your skin and eyes because cyanoacrylate bonds extremely quickly.

What Makes Flourish Glue Useful for Aquascaping?
Flourish Glue uses cyanoacrylate in a controlled gel formula. This consistency lets aquarists position plants without dealing with loose liquid adhesive. It also reduces the need for thread, plant weights, or awkward temporary supports. Most importantly, the adhesive can bond while submerged, which simplifies established-tank maintenance.
Unlike ordinary liquid super glue, the gel stays closer to the spot where you apply it. Therefore, you can create cleaner attachments around detailed hardscape. The adhesive works particularly well when plants need stable contact before their natural attachment develops.
Which Aquarium Plants Work Well?
Flourish Glue works especially well for mosses and plants that grow on hard surfaces. Epiphytic plants can also benefit because they do not require deep planting in substrate. Common aquascaping choices include mosses, Anubias, and Bucephalandra.
However, avoid covering large portions of delicate plant tissue with adhesive. Instead, target a small root area or suitable attachment point. This approach provides stability while leaving most of the plant exposed to water and light.
How to Prepare Before Applying the Adhesive
Good preparation makes the actual bonding process faster and safer. First, decide exactly where the plant should sit before opening the tube. Next, inspect the rock, wood, or gravel and remove loose debris from the attachment area.
Whenever practical, remove the hardscape from the aquarium before gluing. Pat the bonding surface dry with a clean cloth or paper towel. A relatively dry surface gives you better control over the initial glue placement.
Then, examine the plant and remove damaged material carefully. Keep healthy roots, rhizomes, or moss portions exposed where appropriate. Avoid crushing delicate stems while preparing the attachment point.
Protect Your Hands and Eyes
Cyanoacrylate can bond skin and eyes within seconds. Consequently, keep your fingers away from the adhesive bead and avoid touching your face during application.
Work slowly, even though the glue sets quickly. Keep the tube away from children and pets during the entire process. If glue contacts your eyes, rinse them with water for several minutes and seek medical attention if irritation continues.
Step-by-Step Method for Safe Application
1. Plan the Final Position
Start by placing the plant against the selected surface without glue. Check its angle, orientation, and visual balance first. This simple test prevents rushed adjustments after applying the adhesive.
2. Dispense a Small Amount
Dispense a small amount of Flourish Glue immediately before each application. A small bead usually provides enough adhesive for a modest attachment point.
Do not create a thick mound simply because the plant feels unstable. Excess glue can produce a noticeable patch and wastes material. Instead, improve the contact between the plant and hardscape.
3. Apply the Glue to the Correct Area
Apply the adhesive to moss or an appropriate plant root area. For bunch plants, apply the glue and plant them normally into the substrate.
Keep adhesive away from unnecessary plant surfaces whenever possible. You want the glue to anchor the plant rather than coat it. Therefore, choose the smallest practical contact point.
4. Press the Plant Into Position
Press the plant firmly against the selected surface for about 20 seconds. Maintain steady pressure instead of repeatedly moving the plant during this period.
Afterward, inspect the connection before releasing it completely. If the plant shifts, reposition it carefully and use a smaller controlled application. Avoid repeatedly adding glue to an already covered area.
5. Allow the Bond to Set
Flourish Glue bonds within seconds, including when used underwater. Nevertheless, give the attachment time to stabilize before exposing it to strong water movement.
Keep aquarium inhabitants away from uncured adhesive whenever possible. Seachem states that the product itself does not harm tank inhabitants merely by entering water. However, an animal can stick to unset glue if it tries to eat or investigate it.
How to Use Flourish Glue Inside an Established Aquarium
You can use Flourish Glue without completely draining an established aquarium. The underwater capability makes quick repairs and plant repositioning much easier.
First, reduce strong water movement around the working area. Then position the plant and apply a small amount carefully. Hold the plant against the hardscape until the bond develops.
Work slowly around fish, shrimp, and snails. If an animal approaches the adhesive, pause until it moves away. This extra patience reduces the chance of accidental contact with uncured glue.
When Dry-Surface Application Works Better
Dry application often provides better precision when you can remove the hardscape safely. You can see the adhesive clearly and control its placement more accurately.
After bonding, return the hardscape carefully to the aquarium. Avoid scraping the attachment against another rock or decoration. This method works particularly well during planned aquascaping sessions.
Important Surfaces to Avoid
One important limitation separates safe application from poor application. Seachem specifically says not to use Flourish Glue for adhering items to glass surfaces.
Therefore, do not use it to mount decorations directly against aquarium panels. Instead, attach suitable plants to compatible hardscape such as rock or driftwood. Choose another purpose-built method when structural glass attachment becomes necessary.
Rock, Driftwood, and Gravel
Rock provides a stable attachment surface for many aquarium plants and mosses. Driftwood also creates natural mounting points for plants that prefer elevated growth.
Flourish Glue can also help attach suitable plants to gravel. However, consider whether the gravel provides enough stability for the plant. A heavier or more stable base may produce a better long-term result.
Common Mistakes That Can Cause Problems
- Using too much glue: Large amounts rarely improve an attachment proportionally.
- Skipping position planning: Fast-setting glue leaves little time for experimentation.
- Touching the adhesive: Cyanoacrylate can bond skin extremely quickly.
- Ignoring aquarium inhabitants: Curious livestock can contact unset adhesive.
- Gluing directly to glass: Seachem does not recommend this application.
- Covering plant tissue unnecessarily: Use a small attachment point instead.
- Forgetting the tube tip: Dried adhesive can make future applications difficult.
How to Keep the Tube Ready for Future Use
Proper tube care helps you get more useful applications from each package. After applying the glue, wipe the tube tip clean before replacing the cap.
This step prevents leftover adhesive from hardening around the opening. Consequently, the cap remains easier to remove during your next aquascaping session. Store the tube securely and keep it away from children.
What to Do After Attaching Aquarium Plants
Once the attachment sets, inspect the plant from several angles. Check whether the plant sits naturally and whether water movement can dislodge it.
Then restore normal circulation gradually if you reduced flow during application. Watch the attachment during the next maintenance session. If the plant moves, identify the underlying cause before adding more adhesive.
Strong flow may require a better mounting location rather than additional glue. Likewise, unstable rock can undermine an otherwise strong plant attachment. Solve the structural problem first, then reassess the adhesive bond.
Flourish Glue Versus Other Aquarium Adhesives
Different adhesives solve different aquascaping problems. Flourish Glue suits small plant and moss attachments where fast bonding matters.
For heavier rock structures, an aquarium-safe epoxy can provide a more appropriate solution. Seachem’s Flourish Epoxy, for example, targets hardscape stabilization rather than small plant mounting.
| Application | More Suitable Approach | Reason |
|---|---|---|
| Moss on rock | Flourish Glue | Fast, controlled attachment |
| Plant on driftwood | Flourish Glue | Small attachment points work well |
| Bunch plants | Flourish Glue | Helps anchor plants during establishment |
| Heavy rock structure | Aquarium epoxy | Provides structural support |
| Direct glass bonding | Use an appropriate glass-safe method | Flourish Glue is not recommended for glass |
How to Decide How Much Glue to Use
There is no universal bead size because plants and surfaces vary considerably. Start with less adhesive and increase only when the attachment genuinely needs more support.
For small moss portions, a tiny amount can provide sufficient initial contact. Larger plants may need multiple small attachment points rather than one oversized blob.
However, prioritize contact quality over adhesive quantity. A clean, stable surface usually helps more than simply adding additional glue.
Safety Considerations for Fish and Invertebrates
Flourish Glue is designed for aquarium use and can be used in freshwater or saltwater systems. Seachem describes the product as nontoxic to aquarium inhabitants once used appropriately.
Still, nontoxic does not mean harmless during every stage of application. Unset adhesive can physically stick to mouths, teeth, fins, or other exposed surfaces.
Therefore, prevent fish and invertebrates from contacting fresh glue. This precaution matters especially in aquariums containing curious shrimp or bottom-dwelling species.
A Better Workflow for Precise Aquascaping
Professional-looking results usually come from preparation rather than excessive adhesive. Arrange your hardscape first, test plant positions, and identify every attachment point before opening the tube.
Next, complete one attachment at a time. This keeps the glue fresh and reduces unnecessary exposure to your hands and aquarium inhabitants.
Finally, inspect the finished aquascape before returning everything to normal operation. Small corrections immediately after bonding can prevent larger maintenance problems later.
Frequently Asked Questions
Can Seachem Flourish Glue Be Used Underwater?
Yes, Flourish Glue can bond underwater, making it useful for established aquarium maintenance.
Is Seachem Flourish Glue Safe for Fish?
Yes, the product is considered nontoxic to aquarium inhabitants when used properly, but animals must avoid unset glue.
Can I Use Flourish Glue on Aquarium Glass?
No, Seachem specifically advises against using Flourish Glue to adhere items directly to glass.
How Long Should I Hold a Plant With Flourish Glue?
Press the plant against the selected surface for approximately 20 seconds.
Can Flourish Glue Attach Moss to Driftwood?
Yes, Flourish Glue can attach moss and suitable aquarium plants to driftwood effectively.
Final Thoughts
Safe use of Flourish Glue comes down to controlled application, correct surfaces, and careful handling. Use a small amount, hold the plant firmly for about 20 seconds, and keep livestock away until the bond sets.
Most importantly, remember that fast-setting adhesive rewards preparation. Plan each attachment before opening the tube, protect your hands and eyes, and never use the product directly on aquarium glass.
If you are ready to improve your aquascape, start with one plant and one stable surface. Test your technique with a small attachment before tackling a larger planting project.