
How to Set Up Fluval Plant and Shrimp Stratum
To set up Fluval Plant and Shrimp Stratum correctly, rinse only if needed, create a gentle substrate slope, fill the aquarium slowly, and cycle the tank before adding livestock. This method protects beneficial bacteria, supports healthy plant roots, and creates stable water conditions for shrimp.
Setting up aquarium substrate correctly improves plant growth and water quality from the beginning. Studies show that most new aquarium issues result from poor cycling or incorrect substrate preparation. This guide explains every important step while also covering Fluval plant and shrimp stratum for readers seeking additional information. By following these practical steps, you can build a healthy planted aquarium with confidence.
What Is Fluval Plant and Shrimp Stratum?
Fluval Plant and Shrimp Stratum is a volcanic soil substrate designed for planted freshwater aquariums. It supports strong root development while creating favorable conditions for freshwater shrimp.
The substrate naturally buffers water toward slightly acidic conditions in many aquarium setups. As a result, many aquatic plants establish roots faster than with inert gravel.
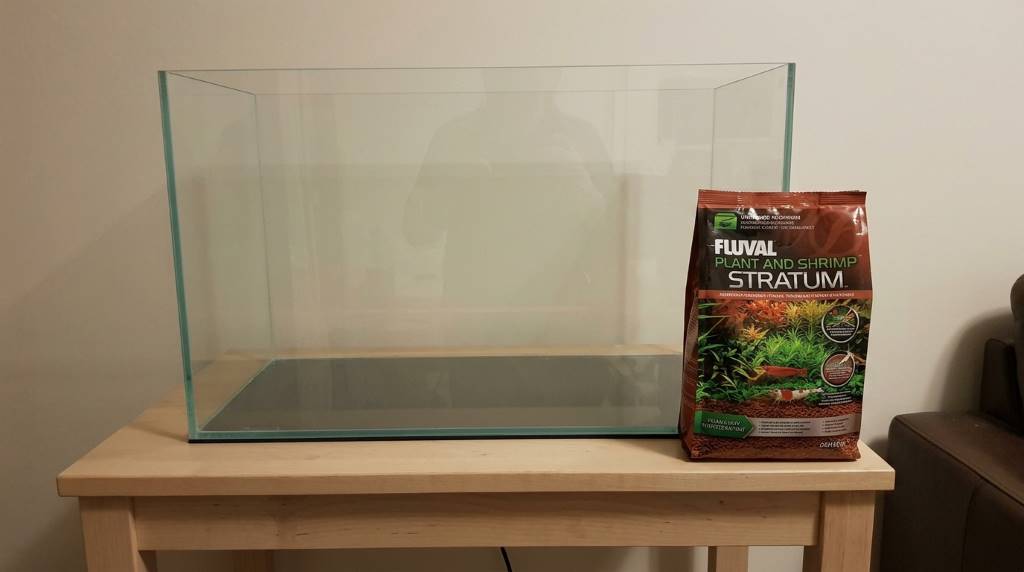
Why Use Fluval Plant and Shrimp Stratum?
This substrate offers more than attractive appearance because it actively supports plant health. It also provides a natural surface where beneficial bacteria quickly colonize.
- Promotes healthy root growth
- Supports beneficial bacteria
- Helps maintain stable water chemistry
- Creates a natural aquascape appearance
- Suitable for most freshwater shrimp species
- Works well with carpeting plants
Items You Need Before Setup
Gather every essential item before opening the substrate bag. Proper preparation makes the installation faster and reduces unnecessary water disturbance.
- Fluval Plant and Shrimp Stratum
- A clean aquarium
- Aquarium plants
- Water conditioner
- Filter
- Heater if required
- Aquarium thermometer
- Bucket
- Small plate or plastic bag
- Water testing kit
How to Set Up Fluval Plant and Shrimp Stratum Step by Step
Step 1: Clean the Empty Aquarium
Wash the aquarium using clean water without soap or chemical cleaners. Any leftover residue may harm fish, shrimp, or beneficial bacteria later.
Dry the glass using a clean microfiber cloth before adding the substrate. This simple step helps remove remaining dust and loose particles.
Step 2: Decide Whether to Rinse the Substrate
Most manufacturers recommend using the substrate directly without heavy rinsing. Excessive washing may remove fine particles that benefit planted aquariums.
However, you may perform one gentle rinse if excessive transport dust appears inside the bag. Avoid aggressive stirring during this process.
Step 3: Add the Correct Depth
Spread approximately two to three inches across the front of the aquarium. Increase the depth toward the rear for a natural appearance.
A deeper rear section supports taller plants with stronger root systems. Meanwhile, the front remains open for carpeting plants and maintenance.
Step 4: Shape the Aquascape
Create gentle slopes before adding rocks or driftwood into the aquarium. Stable hardscape prevents unwanted movement after filling the tank.
Press decorations carefully into the substrate for better stability. Avoid crushing the substrate because gentle pressure works best.
Step 5: Plant Before Filling
Insert aquatic plants directly into the substrate using planting tweezers whenever possible. Healthy roots establish faster before the aquarium fills completely.
Keep enough spacing between plants to encourage future growth. Crowded stems compete for nutrients and available light.
Step 6: Fill the Aquarium Slowly
Place a shallow plate over the substrate before adding water. The plate reduces strong water flow that disturbs the aquascape.
Pour conditioned water slowly onto the plate until the aquarium becomes full. Cloudiness usually disappears after proper filtration.
Step 7: Start Equipment
Turn on the filter and heater immediately after filling the aquarium. Good circulation distributes oxygen throughout the entire aquarium.
Verify that every device operates correctly before leaving the setup unattended. Stable equipment prevents many early aquarium problems.
Step 8: Cycle the Aquarium
Allow the aquarium to complete the nitrogen cycle before adding fish or shrimp. This process develops beneficial bacteria that process harmful waste.
Test ammonia, nitrite, and nitrate regularly using a reliable water testing kit. Patience during cycling creates healthier livestock conditions later.
Best Plants for This Substrate
Many freshwater plants grow successfully with this nutrient rich substrate. Beginners and experienced aquascapers both appreciate its flexibility.
- Monte Carlo
- Dwarf Hairgrass
- Cryptocoryne species
- Amazon Sword
- Staurogyne Repens
- Ludwigia species
- Rotala species
- Anubias attached to wood or rocks
Best Shrimp for This Setup
The substrate works especially well for several freshwater shrimp varieties. Stable water conditions improve molting and overall health.
- Cherry Shrimp
- Crystal Red Shrimp
- Crystal Black Shrimp
- Blue Dream Shrimp
- Tiger Shrimp
Common Mistakes to Avoid
Many beginners experience preventable issues during the initial aquarium setup. Fortunately, careful planning eliminates most common mistakes.
- Adding livestock before cycling finishes
- Using untreated tap water
- Pouring water directly onto the substrate
- Overcrowding plants
- Ignoring water parameter testing
- Cleaning the substrate too aggressively
Maintenance Tips
Routine maintenance keeps the substrate healthy for many years. Consistent care also improves plant growth and water clarity.
- Perform weekly partial water changes
- Trim plants regularly
- Remove dead leaves quickly
- Test water parameters consistently
- Avoid deep vacuuming around plant roots
- Replace evaporated water carefully
How Long Does the Substrate Last?
The substrate continues supporting plants for several years under normal aquarium conditions. Nutrient levels gradually decline with long term use.
Root fertilizer tabs can supplement mature planted aquariums when necessary. Therefore, complete substrate replacement rarely becomes immediately necessary.
Is This Substrate Good for Beginners?
Yes, beginners can successfully use this substrate with proper preparation and patience. Following a careful setup routine prevents most early mistakes.
Learning the nitrogen cycle remains the most important part of long term aquarium success. Good water testing habits also improve confidence quickly.
Conclusion
Learning how to set up Fluval Plant and Shrimp Stratum correctly creates the foundation for a thriving planted aquarium. Careful installation, slow filling, and complete cycling protect both plants and future livestock.
Follow each step carefully, monitor water quality regularly, and enjoy watching your planted aquarium mature naturally. Start your setup today and build a healthy aquatic environment that remains beautiful for years.
Frequently Asked Questions
Do I need to rinse Fluval Plant and Shrimp Stratum?
No, heavy rinsing is generally unnecessary because it may remove beneficial fine particles.
How deep should the substrate be?
A depth of two to four inches works well for most planted freshwater aquariums.
Can I add shrimp immediately after setup?
No, always complete the nitrogen cycle before introducing shrimp.
Does this substrate lower pH?
Yes, it often helps maintain slightly acidic water conditions in many freshwater aquariums.
How long does Fluval Plant and Shrimp Stratum last?
It commonly supports healthy plant growth for several years with proper maintenance.